If you want to monetize your website with ad networks like Ezoic, Adsense, PropellerAds, and many others. To do this, you need to create an ads.txt File for the website either hosted on BlogSpot, WordPress, or any other Content Management System.
So, in this article, we are going to find every possible technique to Create an ads.txt File for Blogspot and WordPress along with updating and maintenance of the ads.txt file. Let’s start the discussion of the complete Guide:
Before moving ahead let us discuss some basics regarding the ads.txt file.
What is Ads.txt and what it does do?
Ads.txt stands for Authorized Digital Sellers which is an initiative of IAB Technology Lab to protect publishers and ad companies from ad fraud. It signals ad network “to “who is the authorised seller of the ad space of a domain”.
Ads.txt File in Blogspot
In this section, you are going to learn the best possible method to create an ads.txt in Blogspot.

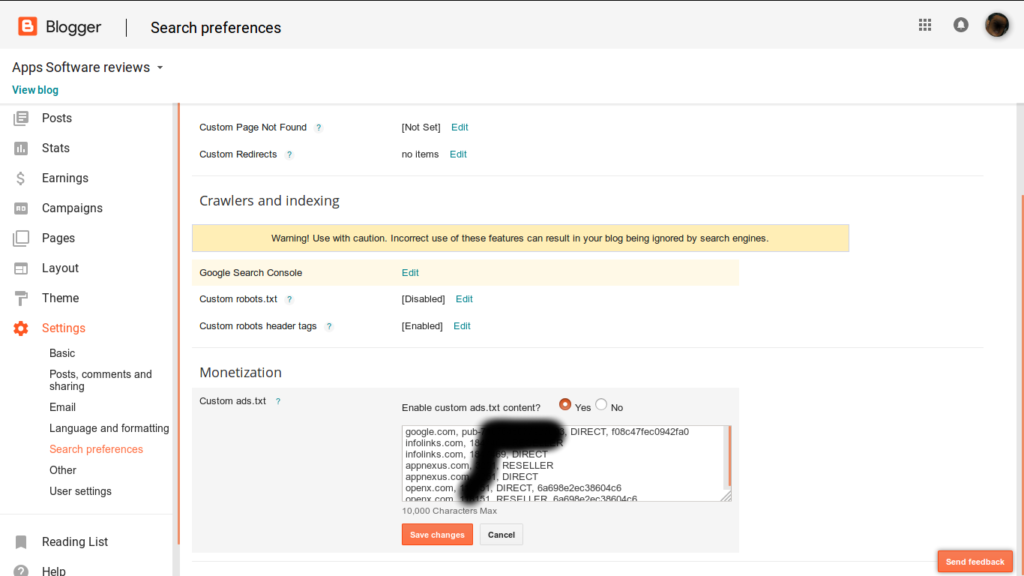
To create an ads.txt file in Blogspot, you need to follow the following steps:
- Go setting
- There will be a tab called monetization
- Place your ads.txt in the custom ads.txt tab
- Thus, you have created your ads.txt file just like apdigi.in/ads.txt
Now, we are going to create an Ads.txt file for WordPress websites.
Ads.txt File in WordPress
In this section, we are going to learn how to create an ads.txt file in the WordPress content management system.
There are two ways to create an ads.txt file in WordPress. These two ways are listed below which we are going to discuss in a very detailed manner:
- Upload an ads.txt in the public directory of WordPress
- Create an ads.txt file through WordPress Plugin
Upload an ads.txt File in the public directory (FTP) of WordPress
Creation of Ads.txt through FTP or public directory is a famous method between webmasters having some technical knowledge and server management skill for unmanaged cloud servers.
So, if you are a technical person, then, this method is going to suit you a lot or if you don’t have a little knowledge of server management, please move to the next method “create ads.txt file through a wordpress plugin.
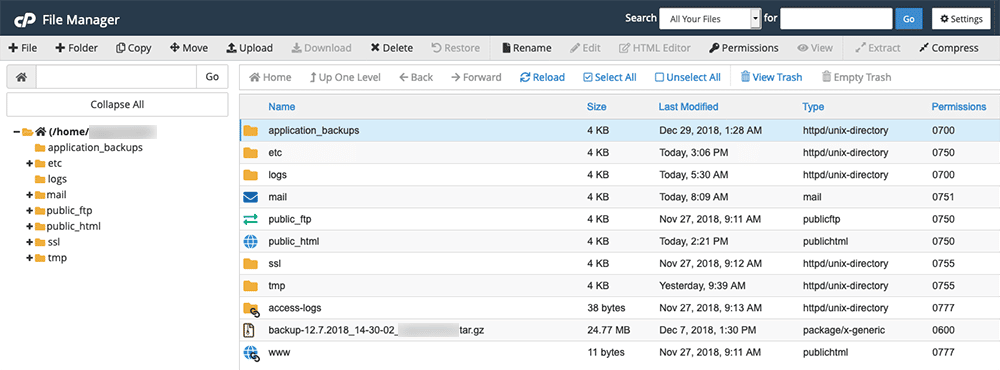
STEP 1:- Login to your Hosting Panel and find the file manager option

You may be hosted with a leading managed WordPress hosting provider or an unmanaged WordPress hosting provider. In most of the case, Your server is manged and hosted with the help of Control Panel.
In this WordPress hosting market, there is more than 40% of the website are powered by C-panel, 20 to 25% are powered by the Plesk, around 5 to 10% are powered by AAPanel like solution. But if your website is hosted by high-end hosting provider like Cloudways, Rocket.net, Siteground, Hostinger, and many other. These high-end hosting provider usually developed it’s own Control Panel.
In the WordPress Hosting solution others than High-end hosting providers, you need to find the File Manager application but in the high end hosting please go to the next step.
Things to Read:
- 20+ Best WordPress Affiliate Programs: You Must Promote
- Best WordPress Theme that Skyrockets Your SEO
- Top 10+ Fastest Cloud Hosting Solution For Better SEO
- Best Managed Cloud Hosting Service to Host!
- 10+ Top Brand New Best tools to find DNS History of a Domain
STEP 2:- Upload to create ads.txt file
Now you have to find the public_html folder in the file manager and upload ads.txt file. Thus, the uploading of the ads.txt file let you create ads.txt file for you website to sold the unsold inventory.
Create ads.txt file through WordPress Plugin
Creation of a Ads.txt through a WordPress plugin is too easy. It’s like Search>Install>Activate>Find Ads.txt> You have Creates.
There are 100s of WordPress plugins are available in WordPress Plugin Marketplace to help to create Ads.txt File. So, later in this article, we will learn about 5 WordPress Plugins that can help you to create ads.txt File to authenticate with ad network.
These 5 Best plugins are listed and discussed below in a very detailed manner:
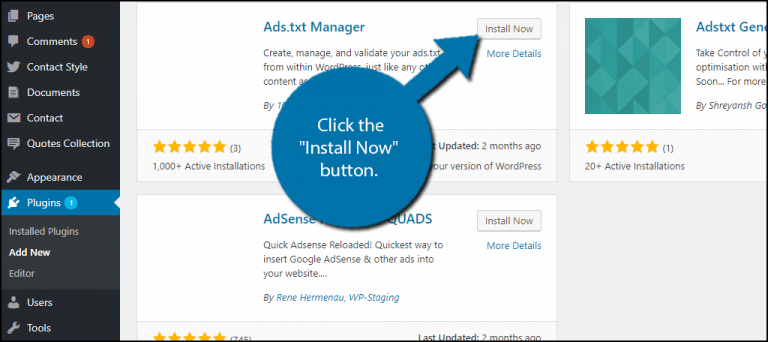
Ads.txt Manager

Ads.txt manager is my favourite WordPress plugin to create Ads.txt file. If you are using a high end ad network like Ezoic that has applied lots of ads.txt codes to improve demand on your website.
To install this plugin, you just need to download in your dashboard from marketplace and install it.
When you signup to this plugin, there will code generated for your WordPress website and you have to paste that code to your panel.


